
Discovering a stuffy bathroom or noticing excess moisture accumulating on walls can be quite frustrating for any homeowner. It’s a situation that many encounter, signalling the need for effective ventilation.
We thoroughly understand the discomfort and annoyance associated with poor air circulation in bathrooms and the potential for mould growth and musty odours.
At Butler Roofing Services, we’ve dedicated ourselves to providing top-notch solutions for installing extractor fans, ensuring your bathroom remains fresh and dry. This guide will walk you through the steps to install a ventilation fan, helping you improve air quality and maintain a comfortable bathroom environment.
Ready to begin? Let’s get started!
How to Install a Ventilation Fan Through a Wall
Installing a ventilation fan through a wall in your bathroom enhances air quality and prevents moisture build-up. We at Butler Roofing Services have compiled essential steps to ensure a smooth installation process.
- Check the bathroom for the ideal location for the new vent fan, keeping it close to an external wall.
- Turn off electricity at the circuit breaker to ensure safety while working with electrical wires.
- Use a stud finder to locate two wall studs near your chosen spot; the space between them should accommodate the fan housing.
- Mark the outline of the vent fan on the inside of the bathroom wall where you plan to install it.
- Drill a reference hole at one corner of your marked outline to guide you from the outside.
- Move outside, and use the reference hole to identify where to cut through the outside wall.
- Cut out the marked area on both sides of the wall using a reciprocating saw, ensuring no damage to any internal wiring or pipes.
- Fit flexible ducting to connect from inside through your new hole, extending it to reach just outside your house.
- Attach the fan housing securely between two wall studs using screws and metal brackets provided by most manufacturer’s instructions.
- Connect electrical wires – including live, neutral, and earth (or bare copper wire) – following strict safety guidelines and ensuring all connections are tight and secure with cable connectors or nuts.
- Attach any external vent cap or roof cap provided with your unit on the opposite side of where you installed it in Step 9, securing it according to the manufacturer’s instructions with screws or roofing nails as appropriate.
- Seal around both internal and external openings of your newly installed exhaust duct and vent cap using foil duct tape or caulking specifically designed for HVAC systems, preventing air leaks and improving efficiency.
- Restore power via the circuit breaker and test your new bathroom extractor fan for proper operation by turning it on.
Each step is crucial in fitting an extractor fan through a wall efficiently while ensuring good indoor air quality in your bathroom and maintaining structural integrity during this DIY project.
Preparing the Outside Wall for the Fan Installation
We know how vital it is to install a bathroom vent fan correctly. Preparing the outside wall is a crucial first step in ensuring your fan works effectively and efficiently.
- Choose the right location on the outside wall, ideally between two wall studs and within 6 feet of the vent point for optimal performance.
- Measure the space needed for the duct hole carefully, using a framing square to ensure straight lines for precise cutting.
- Drill a pilot hole from the inside out, confirming that there’s no obstruction on the other side of the wall.
- Enlarge the pilot hole into a sizeable duct hole that fits your ventilation duct, with care to make clean cuts for a snug fit.
- Install an exterior vent cap to protect against moisture and back draughts; make sure it’s level and securely fastened to avoid leaks.
- Apply caulk around the exterior of the vent cap to create a watertight seal, preventing moisture laden air from entering back into the structure.
- Check for any electrical cables or pipes before cutting into the wall; this safeguards against accidental damage.
Careful preparation ensures your bathroom exhaust fan functions at its best, removing moisture efficiently without causing issues down the line.
Fitting the Vent Fan to the Outside
Here at Butler Roofing Services, we acknowledge the importance of accurately installing a vent fan on the outside wall. This contributes to an effective moisture removal process and prolongs your bathroom fixtures’ lifespan by preventing mould growth.
- Pinpoint the exact location on the outside wall where you wish to fit the vent fan. Use a level to ensure it aligns perfectly.
- Create a guiding hole from inside the bathroom at the centre of the vent’s intended location. This will serve as a guide while cutting outside.
- Make a hole through the wall with a jigsaw or reciprocating saw, following the marked outline. The dimension of this hole should align with your exhaust fan’s outer part.
- Place the vent fan’s casing from the outside, ensuring a snug fit into the hole.
- Fortify the casing with screws provided in your fan kit. Certain models might necessitate drilling holes into masonry walls for insertion of plugs and screws.
- Apply sealant around the fan unit’s perimeter on both sides of the wall to fill any gaps. This step thwarts water entrance and improves energy efficiency.
- Connect the flexible exhaust duct to the outlet port on the back of the fan unit if it hasn’t been done from inside. Use metal clamps or duct tape for a secure fit.
- Place an external grill or louvre on the vent outlet once everything is stable. It prevents pest intrusion and minimises backdrafts.
- Lastly, verify that all electrical connections are safe and meet code standards before operating the new ventilation system.
By adhering to these procedures, we ensure a seamless installation process that augments your bathroom’s ventilation system’s performance and durability.
Sealing the Installation for Efficiency
We finish the installation to enhance its performance. This phase involves making sure that no air escapes from the vent fan system. Appropriate sealing around the fan stops humid air from reaching the attic or loft, which is essential for a moisture-free bathroom atmosphere.
We employ sealants and foam insulators to close off any openings between the fan housing and ceiling drywall or wall structure. This step guarantees that all exhaust fumes exit through the assigned duct leading outdoors, keeping your bathroom pleasant.
Our team is very thorough during this stage to prevent standard problems such as mould growth and structural damage caused by confined moisture. By closing all potential leak spots, we increase the overall efficiency of your newly fitted ventilation fan.
This method also aids in sustaining indoor air quality by stopping undesirable drafts that could introduce external pollutants into your home. Such careful work demonstrates our dedication to providing installations that endure and perform well, making sure your investment in a new extractor fan genuinely enhances your home’s comfort levels.
What Do You Need to Install a Bathroom Exhaust Fan?
To install a bathroom exhaust fan, you need several tools and materials. Start with a drill, screwdriver, wire stripper, and dust mask for safety. Also, have on hand the new fan unit, flexible ducting, external wall vent, cable clamp, and four metal brackets to secure everything in place.
It’s crucial to choose a fan with the correct cubic feet per minute (CFM) rating for your space’s size to ensure effective moisture removal.
Understanding ventilation requirements is key. The bathroom needs an exit point for moist air; otherwise, it can lead to mould growth on walls and furniture. Always select a fan that can handle the volume of air in your room efficiently.
We aim for one that replaces the bathroom’s air at least eight times an hour based on its CFM rating compared to the room’s size in cubic feet.
A correctly chosen exhaust fan will prevent moisture damage and maintain good air quality.
Essential Tools and Materials for Fan Installation
We know the importance of having the right tools and materials for installing a ventilation fan in your bathroom. Here’s a list of what you need to ensure a smooth installation process.
- Screwdriver set: You’ll need various sizes to fit the different screws involved in securing the fan and electrical receptacle.
- Drill with bits: A power drill makes it easy to create holes for the mounting brackets or any electrical work needed.
- Jigsaw or keyhole saw: This is crucial for cutting out the ceiling hole or adjusting space in existing structures.
- Wire strippers: These are necessary for preparing your fan wires and electrical connections.
- Voltage tester: Safety first! Always check for live wires before starting your installation.
- Duct tape or aluminium tape: Use this to seal all joints securely, preventing moisture and air leaks.
- Ventilation ducting: The size should match your fan’s specification to ensure efficient airflow.
- Exterior wall cap or roof vent: This component lets the moist air exit outdoors, keeping it away from roof spaces or lofts.
- Ladder: Ensure it’s stable and tall enough to reach your ceiling without strain comfortably.
- Safety goggles and dust mask: Protect yourself from dust and debris when drilling or sawing.
- Flexible connector (if applicable): This helps connect the bathroom exhaust fan to existing ductwork smoothly.
Each item on this list plays a vital role in fitting an extractor fan efficiently, whether you’re working through a wall or ceiling installation in small bathrooms or larger spaces. Keep these essentials handy, and you’re set for a successful project.
Understanding the Ventilation Requirements
Ventilation requirements in a bathroom are crucial for preventing moisture build-up, which can lead to mould growth and damage to bathroom furniture. Every bathroom needs a source of ventilation, either from a window or, more effectively, an extractor fan.
The size of the bathroom determines the capacity of the extractor fan needed. For instance, larger bathrooms require fans with higher extraction rates measured in cubic feet per minute (CFM).
We must select an extractor fan capable of handling the volume of air in your space to ensure efficient moisture removal.
Moving forward, choosing the right bathroom fan involves not just understanding its capacity but also considering noise levels, energy efficiency, and installation options. Next up is selecting the right bathroom fan for your space.
Selecting the Right Bathroom Fan for Your Space
We acknowledge that selecting the appropriate bathroom fan for your space can appear overwhelming. You must account for your bathroom’s size and the extractor fan’s capability to guarantee effective moisture removal and mould prevention.
The objective is to align the fan’s extraction rate, quantified in litres per second (L/s), with your bathroom’s volume. For instance, a typical small bathroom commonly necessitates an extractor fan capable of handling at least 21 L/s.
Moreover, taking into account noise levels is essential. Fans carry sound ratings measured in decibels (dB). A less noisy fan, around 30 dB or less, is perfect for ensuring comfort, particularly in en-suite bathrooms or those in frequent use during night hours.
It’s equally critical to determine if you prefer a basic model for air removal or one equipped with additional features, such as timers and humidity sensors that automatically deactivate when not in use.
This decision largely hinges on individual preference and budget, but opting for a model with these capabilities can substantially improve efficiency and user satisfaction.
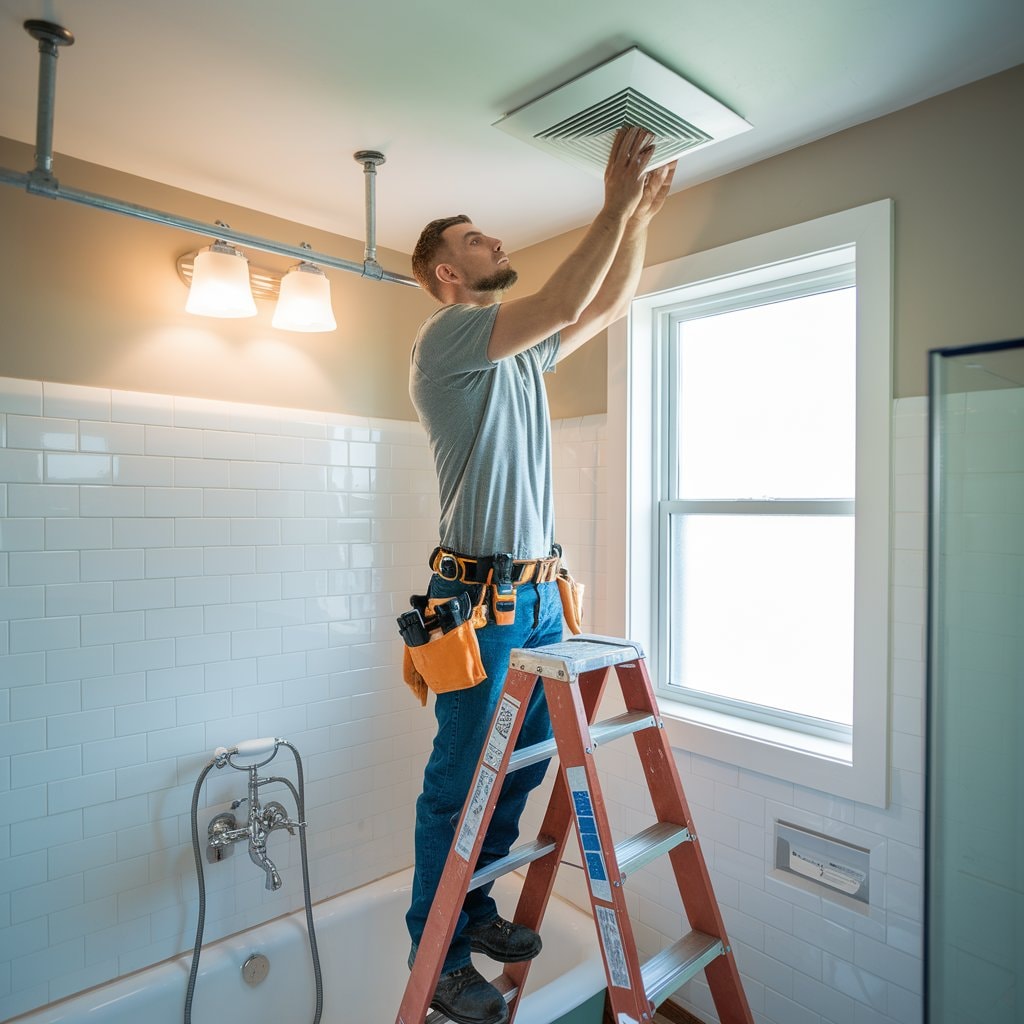
How to Fit an Extractor Fan in the Bathroom Ceiling
Homeowners frequently mention the problem of bathroom moisture. Effectively, this issue can be resolved by installing an extractor fan in the bathroom ceiling.
- Begin by choosing an appropriate extractor fan. Be mindful of your bathroom’s size and select a fan capable of efficiently managing moisture.
- Identify a suitable place for the fan’s vent, ensuring it’s distant from water sources to prevent electrical risks.
- Utilise a stud finder to verify that joists or electrical cables don’t obstruct the targeted spot for your ceiling vent.
- Indicate the required hole for the fan on your bathroom ceiling, conforming to the size guidelines provided by the fan’s manufacturer.
- Cautiously carve out the selected area with a saw, donning safety goggles for debris protection.
- If specified by your extractor fan’s build, install support wires or brackets, making sure they’re securely positioned.
- Arrange and employ straight connectors or adaptable ducting if necessary to direct expelled air to an outdoor vent.
- Establish an electrical connection for the fan, ensuring wire ends match and are secured with wire nut safety measures.
- Position the fan’s frame into the ceiling opening, securely fitting it as per the manufacturer’s guidelines, typically via provided screws.
- Affix any ornamental covers or faceplates supplied with your extractor fan, which generally attach with ease.
By doing this, you prevent excess moisture and mould, contributing to a healthier living space in your home.
Determining the Position of the Ceiling Vent
We at Butler Roofing Services understand the importance of correctly installing ventilation fans in your bathroom. Knowing where to place the ceiling vent is crucial for optimal airflow and moisture removal.
- Assess the bathroom layout. Look at the existing setup to decide on the best spot for your fan. The position should allow for efficient air extraction, usually near the shower or bath.
- Check for obstacles. Ensure there are no joists, pipes, or electrical wiring where you plan to install the vent part of the fan on the ceiling.
- Consider accessibility to power sources. The chosen location needs access to an electrical receptacle inside, making it easier to connect your fan to power.
- Measure accurately. Use a tape measure to find the centre point between fixtures and ensure you have enough space for the size hole needed for installation.
- Aim for straight duct routing. Position the fan in a way that allows for a straight path from the fan’s exhaust port through to the outside; minimising bends that can restrict airflow.
- Follow building codes and manufacturer’s guidelines regarding distance from bath or shower areas to avoid electrical hazards and ensure the safe operation of your new fan.
- Think about future maintenance and replacement needs: place your fan where it can be easily accessed for cleaning, repairs, or replacement without major disruptions or the need for structural changes.
After determining the best position for your ceiling vent, cutting a precise hole in accordance with that positioning is key; this sets up a smooth installation process.
Cutting the Hole in the Ceiling for the Fan
Cutting a hole in the ceiling for a fan is a critical step in improving bathroom ventilation. We want to ensure that you install your fan smoothly and efficiently.
- First, select the position of the vent on the ceiling where the fan will go. This spot should allow the fan to remove moisture effectively from your bathroom.
- Use a stud finder to locate any joists in the ceiling. You need to avoid these when cutting the hole.
- Outline the correct size for the hole using a pencil or chalk. The dimensions should match those of the fan housing.
- Drill a pilot hole inside your outline. This makes it easier to start cutting with more precision.
- Insert a jigsaw blade into the pilot hole to begin cutting along your outline. Take your time to follow the line closely.
- Hold onto any cut-out piece of the ceiling until you completely remove it. This helps prevent damaging wiring or ductwork hidden above.
- Smooth out any rough edges around the hole with sandpaper. This prepares it for fitting the fan snugly into place.
- Check if there’s enough room above the ceiling for both installation and future maintenance of the fan unit.
- Finally, make sure that this new position for fitting a fan doesn’t block airflow from existing vents or interfere with other fixtures.
These steps guide us in preparing for successful extractor fan installation, ensuring efficient bathroom ventilation while preventing mould growth and moist air issues.
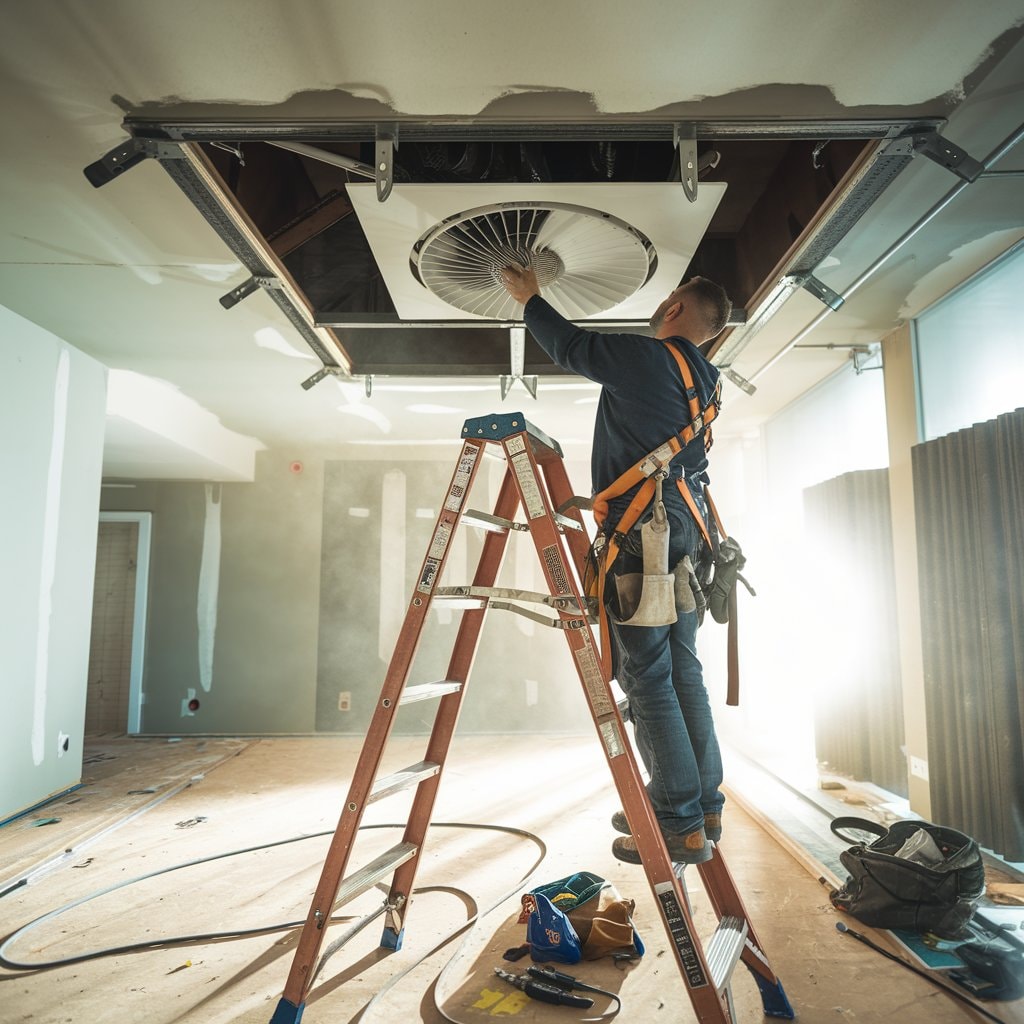
Securing the Fan Housing into Place
We recognise the significance of the correct installation of your bathroom extractor fan. Positioning the fan housing securely is a crucial action that ensures the fan’s efficient and safe operation.
- Initially, determine the location where you want the fan in the ceiling. Think about the loft for the fan or any room in the loft, if applicable.
- Use a pencil to identify the precise location on the ceiling where the fan hole will be. Ensure this meets your ventilation requirements.
- Create a pilot hole at your identified spot. This assists in determining where you will carve out the larger opening.
- Cut the required hole in the ceiling using a saw. Follow the size suggestions from the manufacturer of your fan to prevent any discrepancies.
- Set up your ladder securely under this new hole for a comfortable work position.
- Raise and insert your exhaust fan’s housing into this hole. The brackets or mounting wires should face downwards in your direction.
- Secure these brackets or mounting wires firmly onto nearby ceiling joists. Use screws and a power drill for a secure attachment.
- If your model includes an elbow straight intake port, join it now to secure the correct airflow direction.
- Ensure all connections around the fan frame are tight and secure. Any loose components can cause unwanted vibrations or noise in the future.
- Lastly, draw any electrical wires necessary for connecting your bathroom exhaust fans to their end position, preparing for wiring in compliance with regulations.
During this procedure, we emphasise safety first and encourage switching off power when engaging with installation near electrical systems. These steps aid in establishing a sturdy base for your new ventilation system, fostering improved air quality and moisture management in your bathroom.
Steps to Install a Bathroom Ventilation Fan
Installing a ventilation fan in your bathroom can significantly improve air quality and prevent mould. Our team at Butler Roofing Services is here to guide you through the process.
- Determine the fan location, ideally opposite the bathroom window, to ensure optimal airflow.
- Turn off the electrical supply to avoid any accidents during installation.
- Measure and mark the exact dimensions of the new fan on your ceiling or wall.
- Use a saw to cut through the marked area for the fan placement. Be precise in this step to avoid making larger adjustments later.
- Install the bracket end of the fan housing into its final position, ensuring it’s secured horizontally for ceiling placements or vertically for wall installations.
- Connect the blower motor and ensure that all bare wire connections are properly insulated.
- Attach ductwork to direct moisture outside your home, cutting a knockout hole if necessary for new installations.
- Securely fit an external vent cover on the outside wall or roof to protect against weather damage and pests.
- Restore power and test the fan for any unusual noise or vibration issues that might indicate improper fitting.
- Check that air efficiently exits through the external vent when operating, confirming successful installation.
Following these steps can help you install a ventilation fan without facing common issues such as excessive noise or inadequate ventilation, enhancing bathroom comfort and functionality.
Step-by-Step Installation Process
At Butler Roofing Services, we appreciate the importance of a correctly fitted extractor fan in your bathroom. We’re here to guide you carefully through the step-by-step procedure for fitting an extractor fan, promoting effective moisture removal and guarding against mould in your space.
- Assemble all necessary tools and materials. Before initiating, verify that you have all the required items, such as a drill, screwdriver, wire strippers, screws, ducting, and the extractor fan itself.
- Identify the best location for the fan. The position is crucial; usually, placement in the ceiling or via an external wall provides the best results for peak performance.
- Identify the area for your hole. Utilise a pencil to denote where you will make an incision in the ceiling or wall, contingent on the size of your fan.
- Carve the hole with precision. Operate a jigsaw or handsaw to accurately adhere to your markings, creating a cut-out for the fan.
- Fasten the housing or frame of the fan. Once the hole is prepared, set it and secure using screws.
- Wire electrical connections safely. Confirm the power is turned off at the mains prior to connecting wires following the manufacturer’s guidance.
- Connect ducting to divert moisture in the right direction. Set up the ducting from the side of the extractor fan to channel damp air outdoors or into a vent system; affix it with clamps or tape.
- Install an external vent if necessary. For fans venting via a wall, set up an external vent shield on one side of your home’s façade for safeguarding and managing airflow.
- Seal all conjunctions securely. Verify every junction between ducts and fittings is made airtight with sealing tape or silicone sealant to avoid leaks.
- Reinstate electricity and scrutinize your installation. Activate the mains supply again then switch on your new extractor fan to assess its functioning.
Each stage assures that the installation of an extractor fan meets ventilation prerequisites but also merges seamlessly with existing infrastructure whether supplanting an old fan or setting up a new one in a fresh location within your bathroom area.
Connecting the Fan to the Electrical System
Connecting the fan to the electrical system is a crucial step in ensuring your bathroom ventilation performs effectively. This process requires careful attention to both safety and functionality.
- Turn off the power supply at the mains to ensure safety before starting work. This is essential to prevent any risk of electric shock.
- Remove the cover of the fan to access its wiring compartment. You’ll usually find this on one side of the extractor.
- Feed the electrical cable from your power source through the knockout hole on the side of the fan housing. Secure it with a cable clamp.
- Identify and connect the wires according to their matching colours: live (brown), neutral (blue), and earth (green/yellow). These connections must be secure and correct to prevent electrical faults.
- Use wire connectors or terminal blocks if joining additional lengths of wire is necessary. Ensure that all connections are tight and fully insulated.
- Fit an isolation switch outside of the bathroom for added safety. This allows you to control power to the fan without having access to the main electrical panel.
- Restore power at the mains, then test your fan by switching it on. Listen for any unusual noise and feel if air is being extracted efficiently.
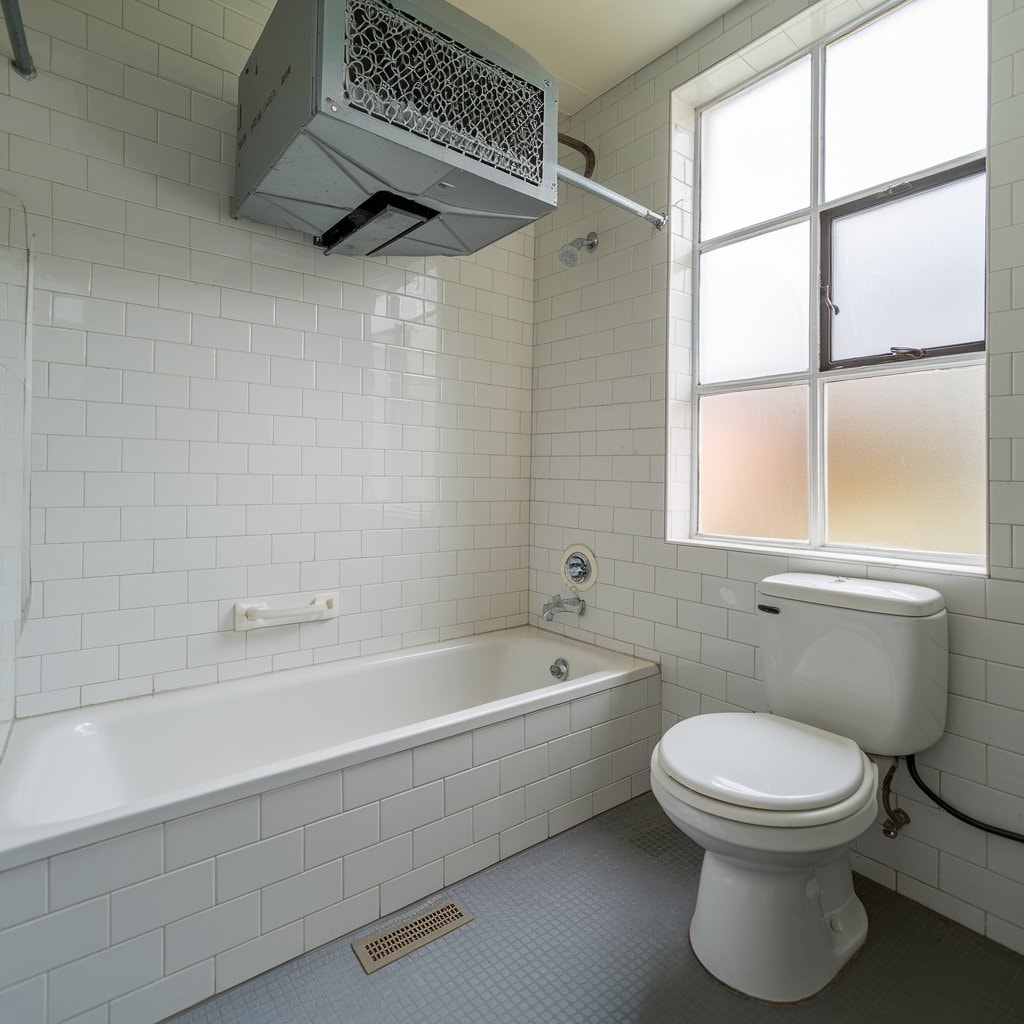
- Check that all parts of the installation blow moisture from your bathroom directly outdoors rather than into another room or loft space, as this could lead to mould growth.
Each step ensures that your new or replacement fan becomes an integral part of your bathroom’s ventilation system, operating safely and efficiently.
Testing the Fan for Proper Operation
After the fan installation in your bathroom, it’s crucial to ensure everything is operating correctly. We initiate by activating the fan to verify its functionality. It must efficiently eliminate moisture and prevent mould, the primary motive for the installation of a ventilation fan.
If the fan appears noisier than anticipated or shows unusual vibrations, these could be indicators that something is slightly off.
We also confirm that air is circulating unimpeded through the vent. An ideal set-up extractor fan should fit snugly and operate silently, creating a more agreeable atmosphere in your bathroom.
Providing adequate ventilation not only preserves your health but also shields your home from issues relating to dampness.
“One can’t underestimate the importance of a well-working bathroom fan in maintaining a healthy and comfortable living space.
Common Issues When Installing a Bathroom Extractor Fan
We often come across common issues while fitting extractor fans in bathrooms. One frequent problem is noise and vibration from the fan. If not installed securely or if the model isn’t suitable for the space, it can lead to annoying sounds disrupting the peace of your home.
We ensure that each fan goes into place firmly and matches the room’s requirements to combat this issue.
Another challenge is ensuring adequate ventilation within the bathroom. Many times, fans don’t remove moisture effectively due to incorrect positioning or insufficient power for the size of the room.
We tackle these concerns by understanding ventilation requirements thoroughly before installation. This approach helps us select the right bathroom fan that prevents mould and enhances airflow efficiency, keeping your space fresh and dry.
Troubleshooting Noise and Vibration Problems
At Butler Roofing Services, we understand the frustration that comes with noise and vibration problems after installing a ventilation fan. These issues can disrupt the peace in your home, but they are often easy to fix.
The first step involves checking if all parts of the fan are tightly secured. A loose component can cause unnecessary vibrations and noise as it operates. We also advise our clients to inspect the ductwork for any signs of blockage.
A blocked vent can increase pressure on the fan, leading to more noise.
Ensuring proper installation is another crucial step we recommend. Sometimes, fans installed at an incorrect angle or without enough support can lead to performance issues. We always make sure that the fan sits securely and horizontally in its designated space, whether it’s in a new place or replacing an existing one.
If challenges persist, looking into soundproofing options or upgrading to a quieter model might be necessary steps to ensure your bathroom remains a calm retreat.
Ensuring Adequate Bathroom Ventilation
We always advise homeowners and contractors to prioritise ensuring adequate bathroom ventilation. A well-ventilated bathroom helps prevent mould growth by removing moisture efficiently.
We recommend installing an extractor fan if your current setup doesn’t meet the required ventilation standards. The choice of the right extractor fan is crucial; it must have enough power to change the air in the room at least eight times per hour.
Consider factors like the size of your bathroom and whether you’re fitting a fan through the wall or in the ceiling.
A properly installed vent fan prevents mould and ensures a healthy environment.
To achieve this, measure your space accurately before selecting a fan. For bigger bathrooms, you might need more powerful fans or multiple units to maintain optimal airflow. Connect each fan securely and test them after installation to confirm they operate correctly, extracting moist air out effectively without causing excessive noise or vibration issues.
Continuous education on modern ventilation techniques allows us to put effective solutions into place, combating common airflow problems in compact spaces such as bathrooms.
Addressing Airflow and Efficiency Concerns
We understand how crucial efficient airflow is in preventing moisture build-up and mould in bathrooms. Our experience shows that a well-installed fan makes all the difference. Many homeowners face issues because their existing fan does not efficiently remove moisture, leading to damp conditions ideal for mould growth.
To tackle this, we always recommend installing the vent fan at least eight feet away from the bathroom floor to optimise airflow and efficiency. This position ensures that moist air is quickly extracted, keeping your bathroom dry and fresh.
Furthermore, selecting the right extractor fan is vital for achieving desired results. The size of your bathroom dictates the power rating you need; a smaller space might require an extractor fan with less capacity compared to larger bathrooms, where more powerful models become necessary.
We help our clients choose fans that match their specific requirements, ensuring effective ventilation without excessive energy use. By securing the fan into place correctly and connecting it with minimal bends in ductwork, we maximise efficiency while minimising noise and vibration problems often associated with poorly installed units.
Next up: Ensuring Adequate Bathroom Ventilation
Conclusion
Introducing a ventilation fan in your bathroom is crucial for eliminating humidity and averting mould formation. Our guide endeavours to make this task easier. We’ve summarised the required equipment, installation steps for walls or ceilings, and how to rectify common complications.
Whether you’re positioning an extractor fan in a novel location or fixing it horizontally on the left side of the ceiling, adhering to our directions will assure efficient performance.
Our experience verifies that correct installation contributes to enhanced airflow and effectiveness. If your fan oscillates or produces sound, revisiting connections often rectifies the issue.
It’s important to take accurate measurements of your space to select the ideal bathroom fan for superb ventilation. This method helps maintain your bathroom’s freshness and also provides a defence against structural harm due to excess moisture.


