
Discovering leaks in your rubber roof can indeed be a bit of a headache. We often hear from homeowners who are at their wits’ end trying to find effective solutions for fixing their leaking flat roofs.
It’s a widespread issue that leads many to our doorstep, seeking dependable repair methods. Rubber roofing, particularly EPDM rubber roofs, is praised for its robustness and long life.
However, even the most durable materials can fall victim to wear and tear as time marches on.
Over the years, we’ve faced these challenges head-on and have dedicated ourselves to mastering the art of repairing rubber roofing with efficiency. One crucial piece of wisdom we’ve garnered is that proper upkeep and timely repairs can greatly prolong the lifespan of your flat roof.
Our guide lays out step-by-step instructions on how to repair rubber roofing, employing tools such as seam rollers, EPDM cleaner, and lap sealant to secure a watertight finish.
Stick with us; you’ll find it’s quite worthwhile.
How to Repair a Damaged Rubber Roof?
We often tackle rubber roof repairs by first gathering all necessary tools and materials. You’ll need an EPDM repair kit, EPDM cleaner, utility knife, roller, or paintbrush for the application of adhesives and sealants, and, lastly, clean rags for surface preparation.
These essentials ensure a smooth repair process on any damaged rubber roof.
A well-prepared roofing service is key to extending the life of your rubber membrane.
Our step-by-step guide begins with cleaning the area thoroughly with soapy water or a specialized membrane cleaner to remove debris and contaminants. This step can’t be overlooked as it ensures proper adhesion.
Next, we measure and cut a piece of the new membrane that extends beyond the damaged area on all sides. Applying primer around this marked-out area prepares it for better bonding. Once dry, we apply adhesive on both surfaces, wait for it to become tacky, and then firmly place the new piece over the primed area.
We use a roller or equivalent tool to apply pressure evenly across the entire patch to secure its position while preventing air bubbles or wrinkles, which might compromise its effectiveness against water intrusion.
Tools and Materials Needed for Rubber Roof Repair
Repairing a rubber roof requires the right tools and materials. We always make sure we have everything before starting the job. Here’s what you need:
- EPDM cleaner: This ensures the repair area is free from dirt and debris, enhancing adhesion.
- Primer: It prepares the roof surface for patching by improving the bond between the rubber roof and the patch.
- Rubber patch or EPDM membrane: A crucial component that covers holes or cracks effectively.
- Contact adhesive: Used to apply the patch securely onto the surface, ensuring it adheres properly.
- Lap sealant: Ensures a watertight seal around the edges of the repair area.
- Paint roller or brush: Ideal for applying primer and contact adhesive evenly across surfaces.
- Mastic gun: For precise application of lap sealant around repairs.
- Clean rags: Necessary for wiping off excess EPDM cleaner and preparing surfaces.
- Marker creates: To accurately mark out areas on the roof that require attention or cutting of patches.
- Scissors or a sharp knife: These are used to cut the rubber patch material to size accurately.
- Tape measure: Ensures precise measurement of repair areas or materials needed.
Having these items at your disposal makes repairing your rubber roofing efficient and ensures long-lasting results.
Step-by-Step Guide to Patch a Rubber Roof
After gathering the essential tools and materials for rubber roof repair, we need to focus on how to mend a damaged section effectively. Repairing a leaking rubber roof demands accuracy and the right strategy to guarantee a durable solution.
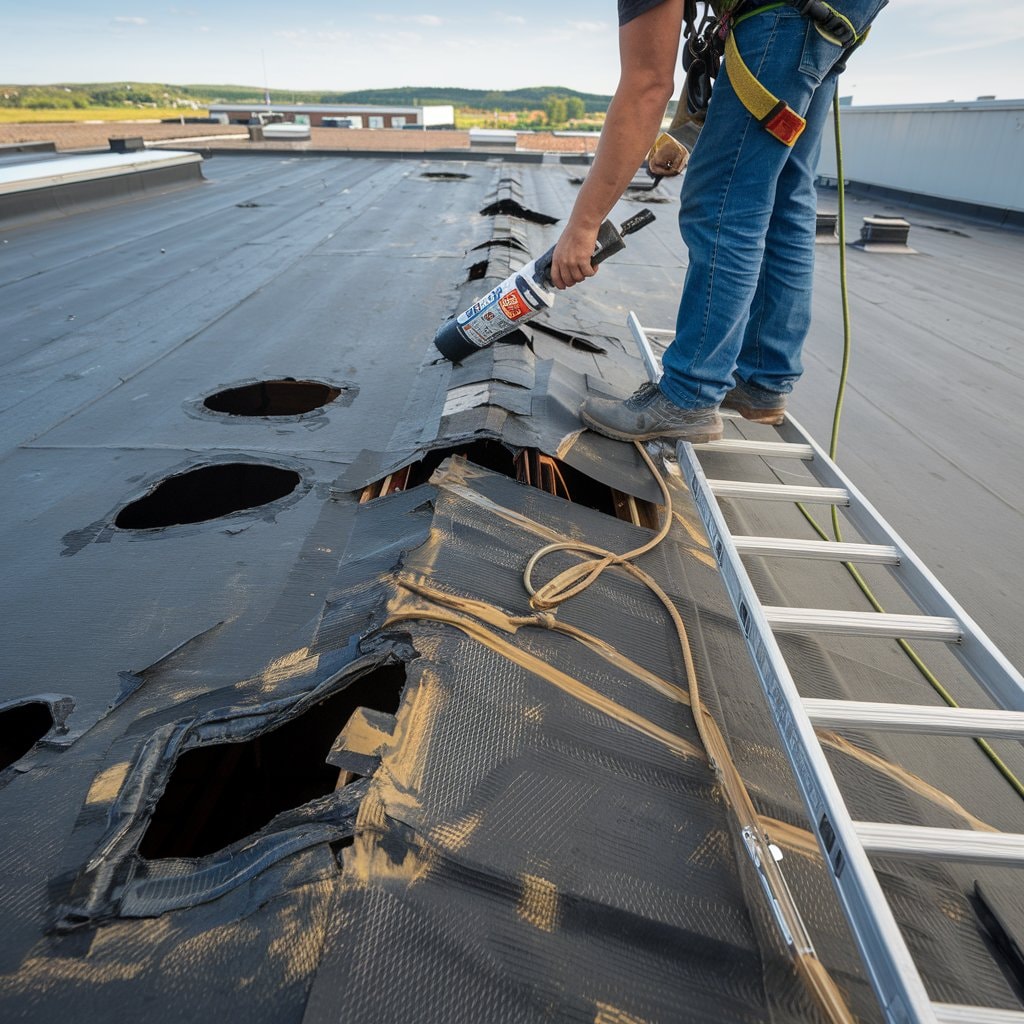
- Survey the roof in depth to pinpoint all piercings, water damage, and areas that require repair. Look for indicators of wear and tear that could undermine the roofing material.
- Purify the area around the damage exhaustively with an EPDM cleaner to eliminate dirt, debris, and any residue that might impede adhesion. A pristine surface is vital for a successful patch.
- Snip a slice of rubber roofing material marginally larger than the damaged area you’re fixing. This ensures ample coverage and a secure seal around all sides of the puncture.
- Apply EPDM primer to both the underside of the new substrate and the area on your roof where you’ll position it. Permit it to dry as per the manufacturer’s guidelines—this stage is critical for proper adhesion.
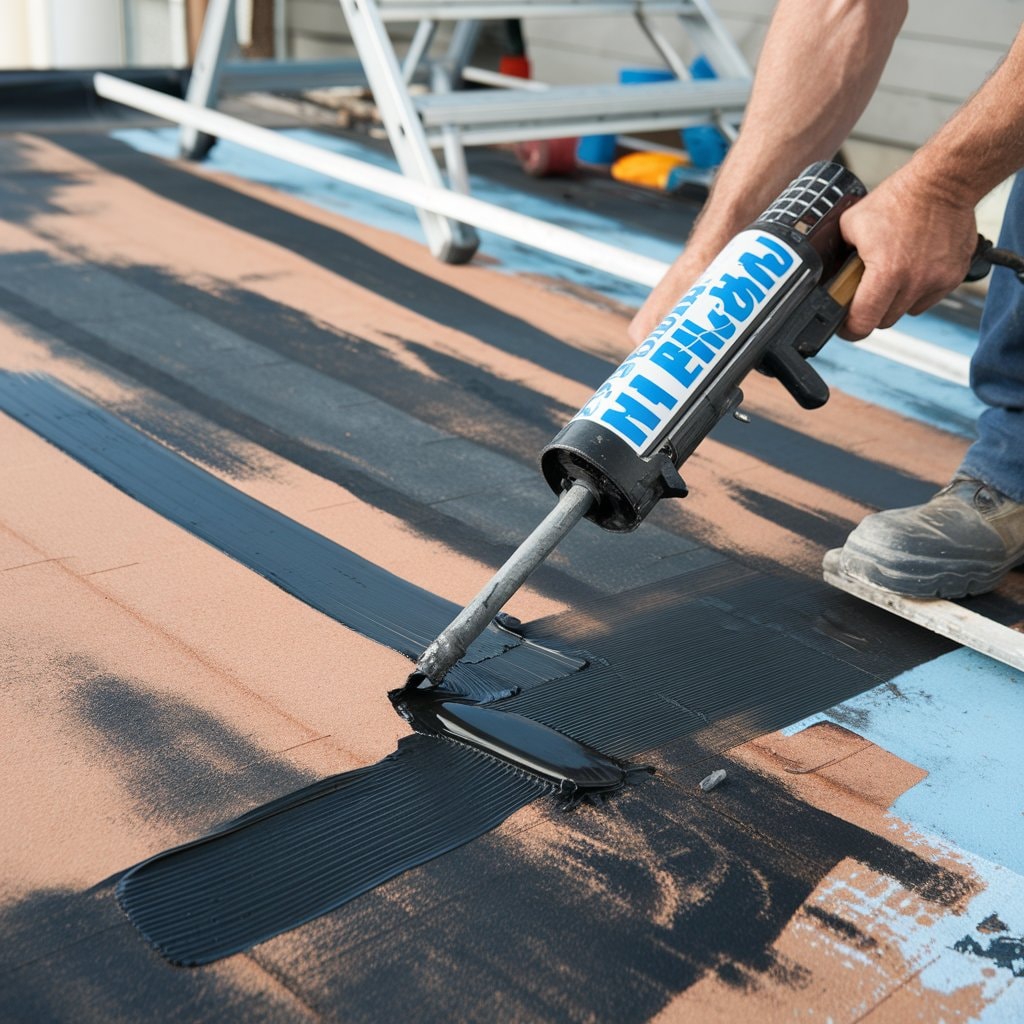
- Once dry, apply contact adhesive uniformly on both surfaces—the new patch and prepared area on your existing roof. Make sure every bit of both surfaces has a thin layer of adhesive.
- Deliberately place your cutout piece over the damaged section, verifying you align it correctly before it settles down since contact adhesive bonds upon touch.
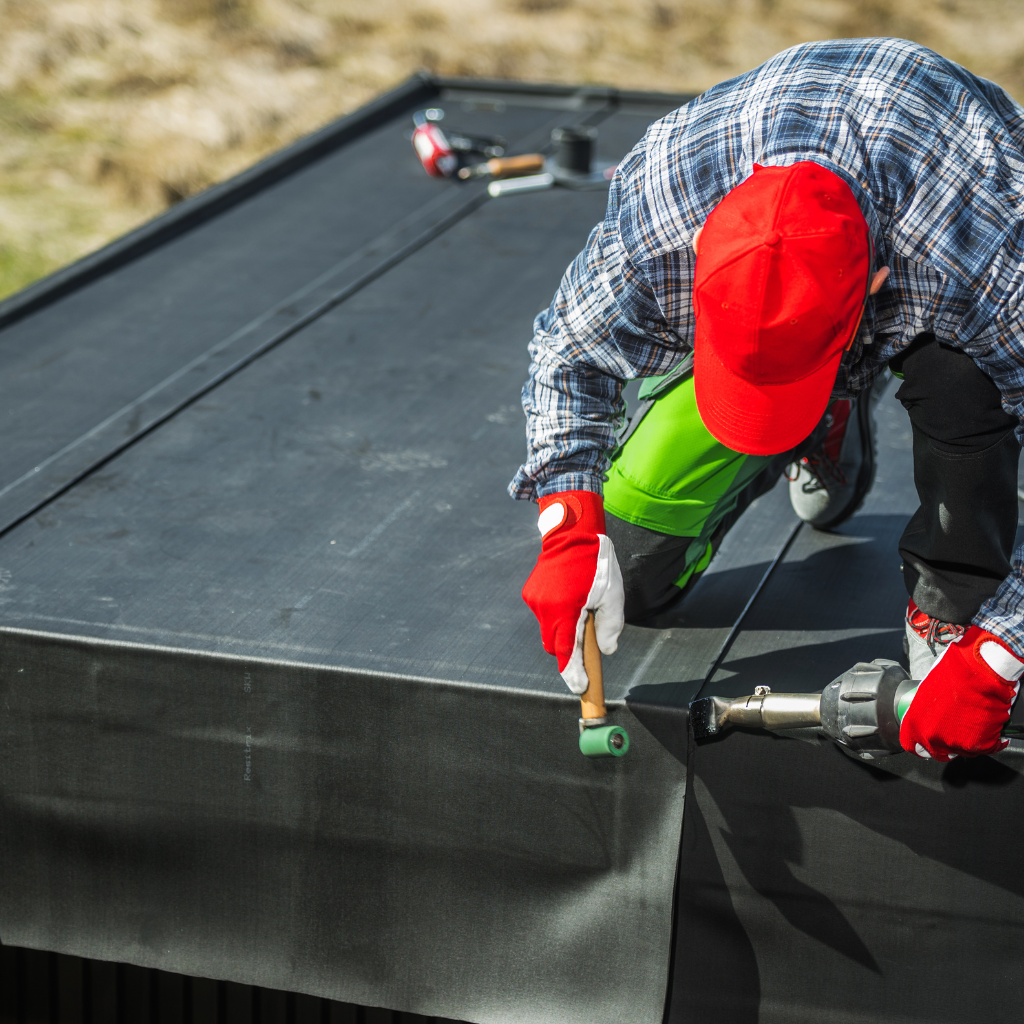
- Press down vigorously across the whole surface of your new patch using a roller or similar tool to guarantee it adheres well without any air bubbles underneath.
- Seal the edges of your patch with lap sealant to create a waterproof barrier around it; this prevents water from slipping under your new patch.
- Examine your work minutely once everything has thoroughly dried—a detailed examination helps spot any overlooked areas or edges that might not adhere correctly.
- As part of ongoing maintenance, scrutinize patched areas during each survey for indicators of wear or lifting edges that could imply water intrusion.
- Verify ambient temperature conditions are beneficial throughout your repair process; extreme temperatures can influence how materials behave and bond together.
By strictly following these steps, we lengthen the lifespan of rubber roofs significantly by evading future leaks and possible water damage through thorough repairs and frequent checks—all part of Butler Roofing Services’ devotion to top-standard roofing solutions for homeowners, decorators, builders, and contractors.
When to Use Sealant and Adhesive
Selecting the appropriate materials is essential for the success of a watertight seal on your rubber roof. We often apply adhesive for rubber roof repairs to bond two surfaces firmly together. This technique is especially useful when installing patches over punctures or tears.
Adhesive ensures that the repair material adheres properly to the existing roofing surface, creating a durable bond that withstands weather conditions and temperature changes.
Sealant, on the other hand, plays a pivotal role in leak prevention around edges and seams where water tends to pool. A bead of roofing sealant applied around the entire perimeter of a patch fortifies its resistance against moisture penetration.
It’s not just about applying; it’s about applying correctly.
The difference between a temporary fix and a long-lasting repair often lies in choosing between sealant and adhesive.
Discovering signs of leaking is next on our agenda, guiding you through identifying potential issues before they escalate.
What Are the Common Signs of a Leaking Flat Roof?
Identifying water damage and stains on your ceiling can serve as an immediate alert for a leaking flat roof. Typically, these indications suggest that water has begun to infiltrate your roofing material, inflicting harm to both the exterior layer as well as the underlying structure.
Routine checks can aid in detecting these problems early on, averting further serious damage.
Also, spotting drip patterns or punctures on the EPDM roof surface can serve as another common alert. During our usual maintenance sessions, we survey areas where the rubber roofing might have been affected due to weather circumstances or physical deterioration.
Homeowners need to be vigilant of these revealing signs and respond swiftly by cleaning and prepping the roof surface for necessary repairs, supporting a waterproof seal, and promoting the longevity of their flat roofs.
Identifying Water Damage and Stains
Water damage and stains on a roof are clear signs your property needs immediate attention. Identifying these issues early can prevent further damage and significant, costly repairs down the line.
Look for discolored patches or areas where water has left marks. This often indicates that moisture is seeping through the rubber roofing, creating the potential for further damage to the underlayment and inside your home.
We also advise regularly inspecting attic spaces for any signs of water penetration. Stains on the ceiling or walls below can indicate leaks your flat roof could mean there’s a leak that needs fixing.
Identifying these problems early, during routine inspections, plays a vital role in extending the lifespan of your rubber roof and ensuring it remains watertight.
Recognizing Drip Patterns and Punctures
Moving from water damage and stains, we also focus on recognizing drip patterns and punctures, which are critical for early leak detection. Drip patterns are often the first sign of a compromised rubber roof.
These can appear as discolored trails or wet spots that persist even in dry weather, indicating the water is seeping through. Punctures, while sometimes small and seemingly insignificant, pose a serious risk if left unattended.
They usually result from fallen branches or mechanical damage during maintenance activities.
A small puncture today can lead to significant leaks tomorrow.
Spotting these issues during regular inspections plays a vital role in preventing future leaks. We advise homeowners and contractors to look for changes in the roof surface texture and coloration that suggest moisture infiltration.
Identifying these early signs enables timely repairs, ultimately extending the life of your rubber roof and maintaining your home’s integrity.
Inspection Tips for Homeowners
After identifying drip patterns and punctures, we turn our attention to crucial inspection tips for homeowners. Regular inspections are essential for keeping your rubber roof in good condition.
We recommend checking for signs of wear and tear, such as cracks or bubbling in the roofing material. Look out for water stains on the ceiling inside your house as well; these can signal leaks that aren’t visible from the outside.
Homeowners should also clear debris from their roofs and gutters. Blocked gutters can cause water to accumulate on your roof, leading to damage over time. Use a soft broom or air blower to remove leaves, twigs, and other debris gently. Remove plastic from the roof to prevent it from trapping moisture and causing damage.
Inspect the flashing around vents and chimneys, too, ensuring it’s securely adhered to prevent future leaks. Following these simple steps will help prolong the lifespan of your rubber roof significantly while preventing potential issue escalation that could require professional repair.
How Do You Patch a Leaking Rubber Roof?
To patch a leaking rubber roof, we first ensure the area is clear and clean. We use either EPDM cleaner or a simple cleaning solution to remove any dirt or debris. This step is crucial for the adhesive to bond properly.
Then, we apply a thin layer of primer around the damaged section, allowing it to dry according to the manufacturer’s instructions. Once dry, we place the patch over the damaged area, ensuring it extends beyond the damage for complete coverage.
We apply contact cement on both the patch and roof surface with care. Pressing down firmly ensures no air bubbles remain and that every edge adheres properly. To guarantee a watertight seal, we finish by applying lap sealant around all edges of the patch, covering any potential entry points for water.
Maintaining your EPDM roof regularly helps prevent future leaks.
Cleaning and Preparing the Roof Surface
We at Butler Roofing Services know that a clean and well-prepared surface is key to fixing a leaking rubber roof effectively. This guarantees that the patch will stick securely and provide a watertight seal.
Here is how you can prepare the roof surface for repair:
- Inspect the roof for any debris or loose materials. These need to be removed before starting the cleaning process.
- Use a broom or a blower to clear off any leaves, twigs, and dirt from the area around the leak. This step is crucial for visual inspection.
- Check for signs of damage like cracks, punctures, or bubbles in the roofing material. These areas will require special attention during repair.
- Clean the area thoroughly with soapy water and a stiff brush. Remove all traces of dirt, moss, or algae to ensure proper adhesion of materials.
- Rinse off the soap with clean water from a hose. Avoid using high pressure as it might cause damage to the rubber roofing.
- Make sure the roof surface is completely dry before applying the patch. Any remaining moisture can prevent proper adhesion.
- Apply primer around the damaged area if needed. This helps in increasing adhesion between the patch and existing roofing material.
- Measure and cut a piece of scrap rubber roofing material larger than the damaged area. This will be used as your patch.
- Before applying adhesive, check that both surfaces are clean, dry, and free from any particles.
Following these steps diligently prepares your roof for an effective repair process, ensuring that your efforts result in a durable fix against leaks.
Applying Contact Cement and Adhesion Techniques
Applying contact cement and adhesion techniques correctly is crucial for ensuring a watertight seal on your rubber roof. We’ll guide you through the process of patching your roof like a pro, using our expertise in roof repair techniques.
- Choose the right type of contact cement. Make sure it’s designed for EPDM rubber roofing to ensure compatibility.
- Clean the area thoroughly where you need to apply the patch. Removing debris and dust will help the adhesive bond better.
- Cut the patch material to size, making sure it extends beyond the damaged area by at least 2 inches on all sides.
- Apply a thin layer of contact cement on both the patch and the roof surface. Use a paintbrush or roller for an even coat.
- Wait for the contact cement to become tacky. Touch it lightly with your knuckle to test; it should feel sticky but not wet.
- Carefully place the patch over the damaged area; begin at one edge and slowly lay it down to prevent air bubbles.
- Use a seam roller or similar tool to press down firmly on the patch, ensuring good adhesion and removing any trapped air.
- Apply a bead of lap sealant around the edges of the patch for additional protection against water seepage.
- Check for any gaps or loose edges, and apply more sealant if necessary.
By following these steps, you can achieve a strong, durable bond that will extend the life of your rubber roof and help prevent leaks. Proper application of contact cement and adhesion techniques are key components of effective DIY roof repairs, saving time and money in long-term maintenance costs.
Ensuring a Watertight Seal with Lap Sealant
After applying contact adhesive and perfecting the adhesion techniques, we focus on sealing everything tightly. Ensuring a watertight seal with lap sealant is critical in preventing future leaks.
- Clean the area around the repair thoroughly. Use a cleaner that removes dirt, oil, and any debris without damaging the rubber roof material.
- Cut the patch to size, ensuring it covers the damaged area with at least two inches to spare all around. This extra space is vital for a secure seal.
- Apply the patch over the clean and prepared surface. Press it firmly into place, starting from the center and moving outwards to remove any air bubbles.
- Apply lap sealant around the edges of the patch. Make sure you cover all edges completely to lock out water.
- Use a roller or similar tool to smooth out the lap sealant. This helps in creating an even layer that adheres well to both the roofing material and the patch.
- Allow ample time for everything to dry according to product instructions. Rushing this step might lead to an incomplete seal.
- Inspect your work after drying. Ensure there are no gaps or loose areas where water could enter.
By taking these steps, we guarantee a solid, leak-proof repair on any rubber roof. Our expertise ensures homeowners can rest easy knowing their roofs are protected against future water damage.
What Are the Best Practices for Maintaining an EPDM Roof?
Maintaining an EPDM roof involves regular inspections to catch issues early. We recommend checking the roof at least twice a year and after major storms. This routine helps identify potential leaks, shrinkage, or damage.
To ensure proper upkeep, cleanse the area of debris and standing water that can expedite the deterioration of rubber roofing. Flashing tape serves a crucial role in sealing edges and around fixtures to forestall future leaks.
Preventing problems is cheaper than fixing them.
Simultaneously, responding promptly with patch solutions when you note punctures or tears can further the life span of your roof. We suggest using recommended adhesives for repairs while verifying their compatibility with your EPDM material.
Regular upkeep maintains the soundness of your roof and enhances your home’s value by warding off expensive damage.
Regular Inspections and Maintenance Tips
At Butler Roofing Services, we know that a well-maintained rubber roof is the key to its longevity and performance. To avoid unnecessary damage and repairs, homeowners, decorators, builders, and contractors must follow these essential maintenance tips.
- Schedule regular maintenance checks at least twice a year. This involves checking for signs of wear and tear, such as cracks or bubbling on the surface.
- Clean the roof surface thoroughly. Remove debris like leaves, twigs, and dirt that accumulate over time to prevent blockages and water pooling.
- Check for water stains or drips underneath the roof after heavy rainfalls. These can indicate possible leaks that need attention.
- Inspect flashing around vents, pipes, and edges for any looseness or damage. Flashing is crucial for preventing leaks.
- Look out for punctures or tears in the membrane. Even small breaches can lead to significant leaks if not patched promptly.
- Ensure drainage systems are clear and functional. Blocked gutters can cause water to back up and pool on the roof, leading to potential damage.
- Apply patch repairs to any damaged areas immediately after cleaning the area carefully. A clean surface ensures better adhesion of repair materials.
- Test seam integrity regularly. Over time, seams may weaken and allow water to penetrate beneath the roofing membrane.
- Verify that all repair materials used match your specific type of rubber roofing. Using inappropriate materials can cause further damage instead of fixing it.
- Keep trees near your property trimmed back. Overhanging branches can scrape against the roofing material during high winds or deposit debris that damages the surface.
By following these pointers, you’ll help ensure your EPDM roof remains robust against elements year-round while avoiding costly repairs down the line.
Preventing Future Leaks with Flashing Tape
Moving on from regular inspections and maintenance tips, we now focus on an equally important aspect: preventing future leaks. Flashing tape plays a crucial role in this. We use flashing tape to seal areas that are prone to leaking, such as around roof installations or where two surfaces meet.
It’s a long-lasting solution that guards your rubber roofs against water ingress.
Applying flashing tape requires precision and care. We clean the area thoroughly before installation to ensure the surface is free of debris and moisture. This ensures maximum adhesion and effectiveness of the flashing tape, keeping your roof leak-free for years to come.
Roof preparation before applying flashing ensures that the repair work holds up against severe weather conditions, providing peace of mind and security for homeowners, decorators, builders, and contractors alike.
Long-Lasting Solutions for Rubber Roofs
We always recommend regular inspections and maintenance as Key strategies for prolonging the lifespan of your rubber roof. These practices help in identifying potential issues before they escalate into major problems.
For instance, using flashing tape at seams can significantly reduce the risk of leaks, a common problem with rubber roofs. This step ensures a strong barrier against water penetration, securing the roof’s integrity over time.
To ensure long-lasting protection, applying lap sealant along edges and around fixtures provides an extra layer of defense against harsh weather conditions. We also suggest cleaning the roof surface periodically to prevent debris accumulation that could damage the membrane.
Adopting these best practices will maintain your EPDM roof’s performance and durability, saving you from frequent repairs and replacements. Engaging with professional roofing services like ours guarantees expert care for your roof, ensuring it remains leak-proof and resilient year after year.
When to Call a Professional Roofer?
Evaluating the measure of roof damage can sometimes be difficult for homeowners, decorators, builders, and contractors alike. Certain scenarios strongly suggest the need to engage an expert roofer.
For example, if you identify extensive water damage or large rips in your rubber roofing, a skilled perspective might spot underlying issues that aren’t instantly apparent. Butler Roofing Services has learned from numerous lesser issues that became severe due to insufficient immediate attention.
Grasping when to solicit expert assistance is crucial for preserving the durability of your roofing system. Employing a qualified roofer assures a proficient evaluation and superior repairs that last.
This strategy saves money eventually and also provides peace of mind, knowing your property is safe from future leaks and damages. Considering cost implications is significant; nevertheless, investing in professional repair services often turns out to be more cost-effective in comparison to DIY solutions that might not endure.
Understanding the Extent of Roof Damage
We often find homeowners find it difficult to measure the severity of damage on their rubber roofs. Distinguishing between a small puncture that requires patching or broad water damage affecting the substrate is vital.
Minor leaks, if overlooked, can progress to significant complications such as mold growth and structural problems. We suggest initiating a comprehensive roof survey to identify any indications of leakage or decay.
This step assists in determining if a DIY patch is adequate or if expert assistance is required.
Our team stresses the significance of acknowledging early signs of wear and tear on your EPDM roof. Regular inspections can identify small problems before they turn into expensive repairs.
Equipment for rubber roof repair and accurate methods are essential in managing these issues effectively. Homeowners should cleanse the vicinity around the damage with care and apply roofing adhesive in the right manner to secure a watertight seal.
For those uncertain about the process, employing professionals like us can be cost-effective in the longer term by avoiding further harm and guaranteeing a superior repair.
Benefits of Hiring a Professional Roofer
Hiring a professional roofer offers numerous advantages, from expertise in handling various roofing materials to ensuring safety on the job. Our team at Butler Roofing Services brings over 20 years of experience to every project, guaranteeing quality and reliability.
- Professionals have extensive knowledge about various types of roofing materials, including rubber roofing. This expertise ensures they choose the right materials for repair or replacement.
- Safety measures are always a priority for professional roofers. They follow strict safety protocols to avoid accidents during roof repair or installation.
- A professional team has access to high-quality tools and equipment needed for efficient and effective roof repairs, allowing them to address issues that DIY efforts might miss.
- Hiring experts means gaining access to warranty protection on both materials and labor, offering peace of mind long after the job is done.
- Experienced roofers can spot potential problems early, preventing minor issues from escalating into costly repairs or replacements down the line.
- Professional services often include a thorough inspection before and after the job. This ensures that the work meets industry standards and addresses all concerns effectively.
- Time efficiency is another significant advantage. Professional roofers can complete tasks more quickly due to their skills and equipment availability.
- The cost of hiring a professional may initially seem higher, but it can lead to savings by avoiding repeated repairs or damage from incorrect DIY solutions.
- Expert roofers can provide valuable maintenance tips and strategies for extending the life of your roof, helping you avoid future leaks and damages.
- Lastly, professionals understand local building codes and regulations, ensuring that all work is compliant and does not lead to legal issues or fines.
Our commitment at Butler Roofing Services goes beyond simple repairs; we aim for durable solutions that protect your home against future weathering and leaks. With our help, maintaining a leak-proof rubber roof becomes an effortless task for owners.
Cost Considerations for Professional Repairs
We recognize that the cost of roof repair can be a key concern for our clients. The price of professional repairs varies based on factors such as the extent of damage, the size of the roof, and the materials required.
Repairs to a damaged substrate or punctures might need specific tools and high-quality materials like EPDM maintenance products and flashing tape, which could affect the total cost.
Labor charges also play a significant role in determining the final price.
Our team offers competitive pricing for high-standard artistry, ensuring you get long-lasting solutions for your rubber roofs without breaking the bank. We use advanced roofing techniques and quality materials to patch rubber roofs efficiently, making sure every job meets our strict standards.
Discussing your needs with us ensures you receive an accurate estimate upfront, helping you make informed decisions about your roofing repairs. Transitioning from discussing costs to understanding when it’s necessary to involve professionals provides homeowners with clarity on managing their roofing issues effectively.
Conclusion
Our team at Butler Roofing Services consistently strives to provide you with the information necessary for efficient rubber roof care. From detecting early indicators of leaks such as watermarks and punctures to directing you through simple repair procedures complete with a guide on tools for rubber roof restoration, we address every aspect.
Our primary concern is aiding you in preserving a leak-resistant roof via routine checks and effective maintenance methods.
Procuring expert assistance becomes vital when the damage appears beyond straightforward DIY repairs. With two decades of proficiency in roofing services, we comprehend the refined details of rubber roofing restorations.
We welcome homeowners, decorators, builders, and contractors to contact us when faced with complicated roofing issues. Choosing expert help not only promotes safety but also promises durable solutions, such as weather-resistant roofing, that safeguard your home against future leaks.


